Character Tutorial S2 - Texturing - Part 15/15
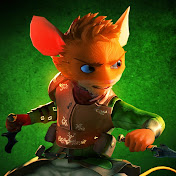
Completed Characters: http://thepointyman.deviantart.com/#/d5eg7ad This is the last tutorial in this series, hope you're enjoying them! We can finally finish off our character by painting the textures in photoshop. Make sure you grab your UV Snapshot in your UV Texture editor and bring it into Photoshop. To paint your character you need some kind of reference, like a blue print before your build your house. In this case, I quickly threw in some rough colours to get a good visualisation of the colour scheme for the character. Once you're clear on what you want, you can begin the painting. Start with rough colour blocking and avoid putting too much detail too early. Then, keep shrinking your brush as you go, use colour blending techniques to apply details and get into the more focused details for your texture. If you are unfamiliar with digital texturing, don't worry, you will find texturing a low poly character will be quite forgiving as even the worst mistakes can look quite nice in 3d space. That's it for this character series guys, see you in the next one! Completion time: 50 - 60 hours
Download
0 formatsNo download links available.